How to Disassemble, Clean, Reassemble and Storage of a Respirator
Table of Contents
ToggleRespirator Half Mask Used
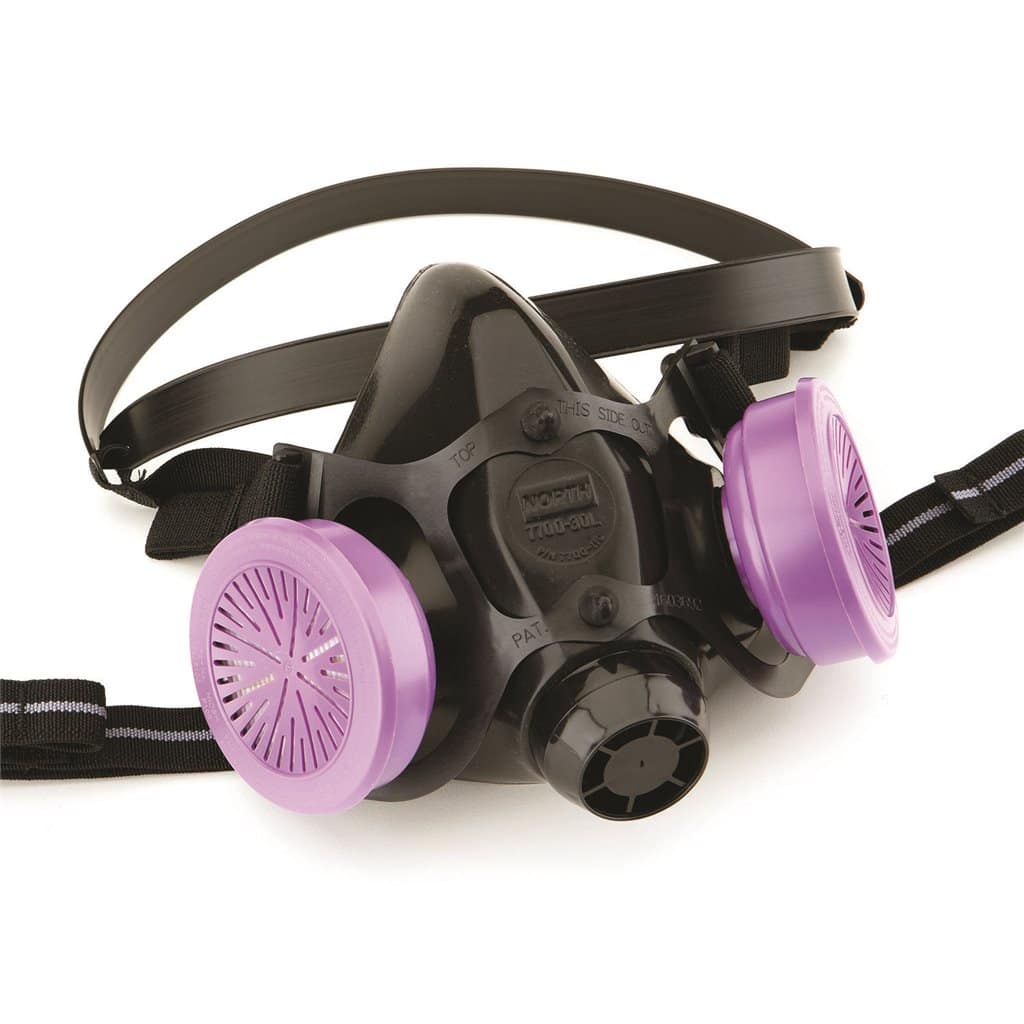
North 7700
This Respirator Maintenance demonstration, we'll use a Honeywell, North 7700, Half Mask Respirator. The same process can be used for the virtually identical Honeywell, North 5500, Half Mask Respirator. The main body is made from 100% medical grade silicone and weighs 4.48 oz (130 grams). Two cartridge filters must be used and must have threads to attach. Respirator Maintenance is one of the keys to healthy breathing on a construction site and all industry that require one to be used.
Respirator Maintenance Step by Step Process
Respirator Maintenance is as important as the legal requirements are for a person to wear one. When conducting a task within the scoop of your work, the exterior of your mask will get covered with contaminates. Crystalline Silica when cutting concrete, asbestos during a demolition, or lead paint will be present. If the substance is dry, do not remove your mask. First use a water mister and sufficiently wet your mask down before removal. Once removed, use a brush with mild dish soap and water to clean the exterior. Make sure to follow the procedures in your region if they differ from this process of Respirator Maintenance.
Respirator Disassembling
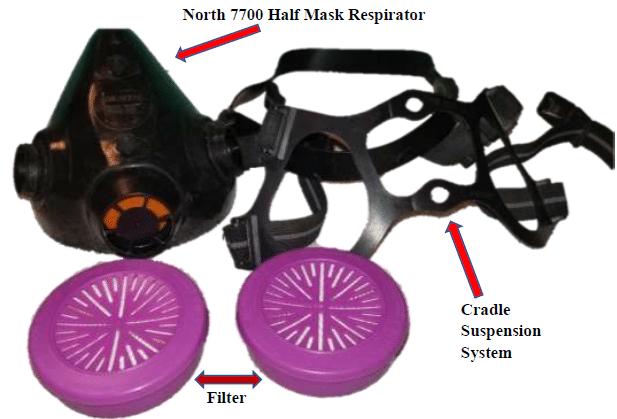
Filters and Cradle Suspension System
Filters and Cradle Suspension System Removal
Step one in Respirator Maintenance is respirator disassembling. Start by removing the filters from the North 7700 by unscrewing them counter clockwise. Once removed, the Cradle Suspension System can be popped off from the rubber tabs on the front. Obviously at this time the filters can be discarded. When conducting a thorough respirator cleaning, never reattach old dirty filters. Place the Cradle Suspension System in a bucket of mild dish soap and let soak.
* Take Note *
Notice on the face it says "Top" and "This side out". This is critical for respirator reassembling.
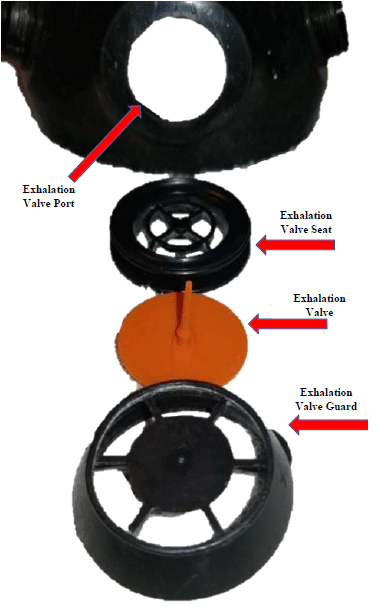
Exhalation Valve Assembly
Disassembling the Exhalation Valve Assembly
The next step in respirator disassembling is removing the Exhalation Valve components. Pop off the exhalation valve guard. Next remove the exhalation valve seat and exhalation valve in one piece. You’ll notice from the picture, the mask is inlayed into a valley within the exhalation valve seat. Careful not to damage the orange rubber diaphragm valve. Finally, with one finger gently push on the inside of the valve where the long protrusion is on the inside section. At the same time with your thumb and pointer finger, pinch the center of the valve on the outside and gently pull out the valve. Place these arts is a cup of the same soap solution.
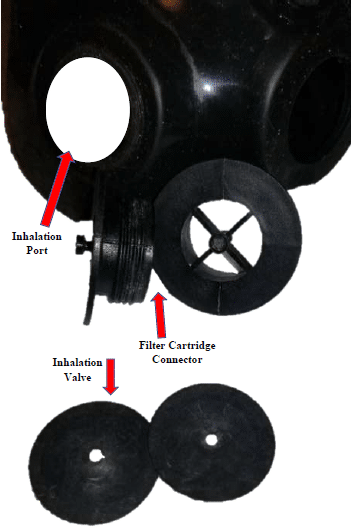
Inhalation Assembly
Disassembling the Inhalation Assembly
The final step in respirator disassembling is removing the Inhalation Assembly. By pushing on it from the inside of the mask, it can be removed. Once again, careful not to damage the black rubber diaphragm valve seated on the protruding plastic tit. To separate the valve from the cartridge connector, slightly pull out and away on the valve. Place these parts is a cup of the same soap solution.
Respirator Cleaning
After the North 7700 is completely disassembled, you will need a soft bristled toothbrush, a dish sponge a bucket of clean water or a sink with a tap, plus dry clean towels. Make sure your in a clean contaminate free area when you begin to perform your respirator maintenance.
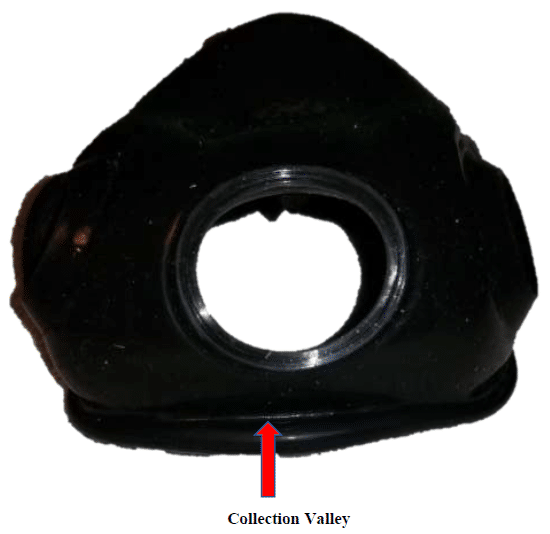
Inverted View
Inverting and Cleaning the Mask
Clean the mask exterior with the brush for stuck on particles. Use the sponge for softer material. When complete, use your hands and gently turn the mask inside out. The lower section that rests on your chin has an interior valley. Perspiration and saliva will be collected here. Scrub clean this section. Not cleaning this area can result in mold forming inside your mask causing a health risk.
Fresh Water Rinse
When cleaning is completed, turn the mask right side in by reversing the inside out procedure. Thoroughly rinse the mask with fresh water. Next use a clean dry towel and dry the both the interior and exterior surfaces. Set aside on a clean surface and proceed to cleaning the parts that have been soaking.
Respirator Parts Cleaning
When cleaning the associated parts for your mask, use the brush on all plastic pieces and the sponge on the rubber valves. Extra care must be observed when handling the rubber valves. It is very easy to rip and damage these parts. After all parts are cleaned and rinsed, dry the pieces using a clean towel. Pat drying the valves is best so they don't rip.
Cradle Suspension System
The last item to be cleaned is the Cradle Suspension System. The nylon woven elastics should be scrubbed to remove any embedded contaminants. After Which this part should be soaked in clean fresh water. When satisfied the elastic is clean and rinsing is completed, use a towel with pressure and your fingers to remove moisture from the straps.
Respirator Reassembling
Reassembling your respirator is the complete opposite of disassembling it in respirator maintenance. Using clean dry hands when reassembling the parts in reverse the order.
Assembling the Exhalation Valve Assembly
When inserting the orange rubber diaphragm valve into the Exhalation Valve Assembly slightly pull with great care on the long protrusion. At the same time, gently push on the round valve section to seat it back through the hole and onto Exhalation Valve Assembly. Next, stretch the mask slightly while coaxing the part into its proper position on the front of the mask. Finally, snap on the exhalation valve guard.
Assembling the Inhalation Assembly
When inserting the black rubber diaphragm valves onto the cartridge connector, gently stretch the valve and place over the tit. Next push the entire part through the side ports of your respirator from the inside. Make sure both parts are seated flush and all the way through their respective side ports.
Reinstalling the Cradle Suspension System and NEW Filters
Remember at the very beginning, it was advised to notice the words "Top" and "This side out" printed on the cradle Suspension system. This is the direction you install the unit onto the face of the mask. The two holes on the front plastic piece of the suspension system get pushed onto the two silicon tits projecting out from the front of the mask. Next screw on two new filters and the process is complete. Your respirator mask is now cleaned, reassembled and ready for use.
Respirator Storage
It is best practised to store your respirator in a clean, contaminate free, freezer ziplock bag. The zippers on these are stronger than most and ensure a sealed environment, keeping your mask clean and contaminate free. Then place the entire unit into a strong cloth bag or container. Always have a few extra ziplock bags on hand incase they rip. Aswell, always store a dirty mask in a separate bag. With in your respirator maintenance kit, always keep an ample supply of alcohol wipes and wet naps. These can be used for minor cleaning at the end of a light days usage.
Charcoal Filter Storage
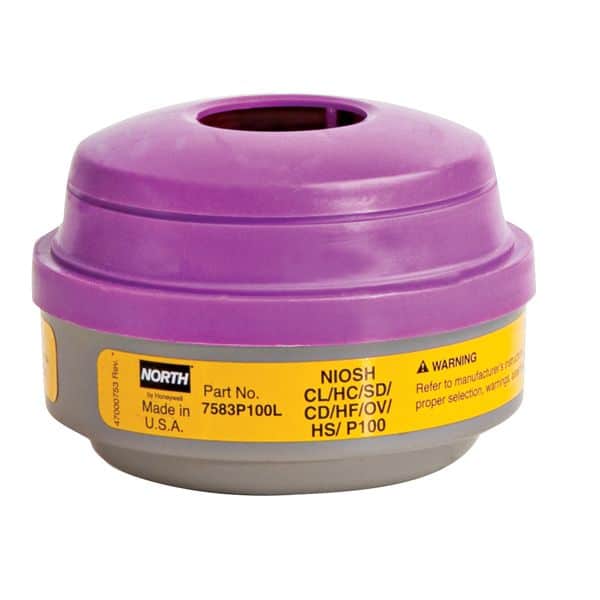
Some filters are a combination P100 HEPA filter. Designed for Organic Vapor Acid Gasses. These filters block Chlorine, Hydrogen Chloride, Sulfur Dioxide, Hydrogen Fluoride, and Chlorine Dioxide. Equipped with a charcoal addition, these filters should be removed and stored in their own bag with the are squeezed out as much as possible. This is due to charcoal is a magnet. When left in the open they will continue to draw in contaminated air. This will result in the charcoal becoming saturating and rendering it useless.
Take Care of your Respirator
Like all personal protective equipment (PPE), your respirator is the last line of defense against deadly contaminants. You must take care of this protective device. It can save your life. Always get a respirator fit test as well prior to ever using a half mask. It is the law in British Columbia and falls under 8.40 of the Worksafe BC Regulations. Also, read the Safety Data Sheet of a chemical and consult your person in charge and/or the site safety officer if you have any questions.
Respirator Fit Testing
Respirator Fit Testing can be conducted here at FreeBird Safety Services
3M 6000 Series Respirator
How Do You Disassemble the 3M Respirator 6000 Series
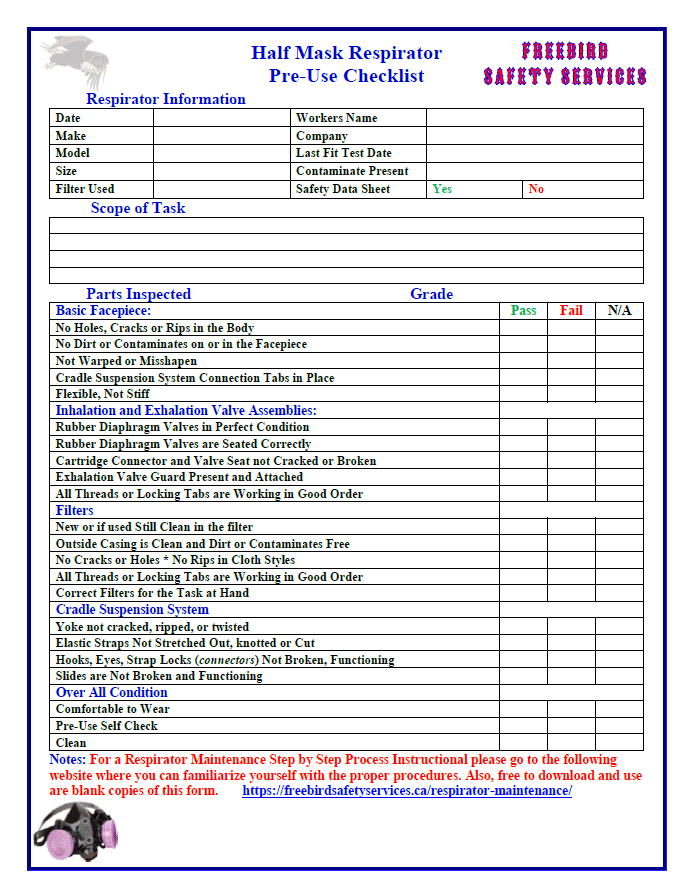
Half Mask Respirator Pre-Use Checklist
Respirator Inspection Form
Half Mask Respirator Pre-Use Checklist
The Half Mask Respirator Pre-Use Checklist, is a 22 point Respirator Inspection Form to be filled out prior to each shift of use of your Half mask Respirator. Starting at the top with the type of half mask you have, followed by the users name and company they work for. As well as other pertinent information about the user. Next is a section for a brief description of the scope of work or task. The final section is the 22 point inspection criteria. Simple place an "X" or checkmark in the correct box.
Good Practice
It's a Good Practice to conduct inspections of respirators prior to using. After all, this particular piece of PPE (Personal Protective Equipment) is your last line of defence when protecting your lungs and life. Contaminating your lungs from substances like Crystalline Silica, Asbestos, Lead Paint Dust, and the vast number of gasses will prolong your life. Not doing so will lead to death.
More Information on Respirators
For more information on Respirators and starting a program, read the manual Breathe Safer. Over 100 pages published by WorkSafe BC chalked full of very useful information.
3M™ Half Facepiece Respirator 6000 Series Training Video
A full length instructional video on the 3M Half Facepiece Respirator 6000 Series
Click on the Picture and the Link will take you to a free downloadable Pdf. Version

